Want to learn how to use Pinterest for business?
This post shows you how to set up a Pinterest account for your business and start posting engaging pins!
So what are the FACTS about using Pinterest for business?
Here are a few:
- The half-life of a Pinterest pin is 1600 times longer than a Facebook post.
- The average Pinterest user spends 14.2 minutes pinning every single day.
- 83% of Pinterest users make a purchase after finding a business on Pinterest.
With numbers like these, it’s easy to see why Pinterest is a HUGE opportunity for business.
It's growing like crazy and the engagement rates are off the chart!
In this article, I'll show you how to harness these fantastic benefits to promote your business on Pinterest.
(Want to get a head start with your competition on Pinterest? Sign up for Post Planner FREE to find, create, and automate ENGAGING Pinterest content!)
How to Use Pinterest for Business: Easy Beginner’s Guide
There are so many reasons to love Pinterest.
But there are also a lot of misconceptions about Pinterest marketing:
- “Only women use Pinterest”
- “People only pin food and wedding content”
- “My target audience isn’t on Pinterest”
- “I don’t have time for another social network”
WRONG, WRONG, WRONG!
Every business can gain a captive audience on Pinterest with the right visual content.
If you have a story to tell and want to reach a whole new audience, then Pinterest is for you!
We’re going to show you WHY your business should be on Pinterest, and HOW to succeed on Pinterest!
Table of contents:
- Is Pinterest good for business?
- How to use Pinterest for business
- PART 1: Pinterest basic
- PART 2: How to use boards and pins
- PART 3: How to level-up your strateg

Is Pinterest good for business?
You’re already on Facebook. You’re probably also on Twitter and Instagram.
Is it worth it to add ANOTHER social media account to your to-do list?
Our answer is YES!
Every social media channel offers a unique set of people, so ignoring any of them could harm your business. Pinterest is no different!
- There are 3 reasons in particular why you CAN’T ignore Pinterest: It offers a brand new audience.
- Pinterest allows for unique content options.
- Using Pinterest for business gives you certain benefits over other social media channels.
Let’s look more closely at these reasons why you should DEFINITELY be using Pinterest for business.
Exposure to new people
Pinterest for business offers you all the benefits we discussed above.
But it will also introduce your business to a whole new audience!
In addition, the Pinterest audience acts entirely differently from other social media audiences. They are:
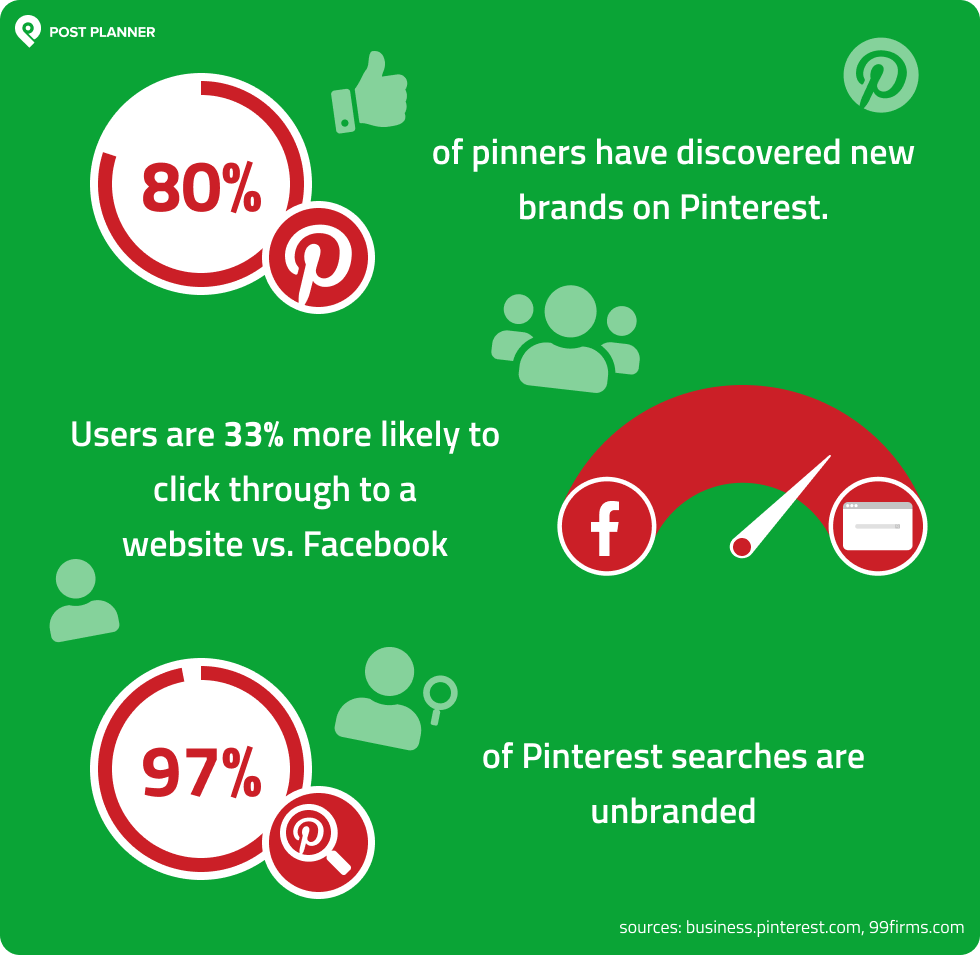
- More ready to buy (80% of pinners have discovered new brands on Pinterest)
- More likely to engage with and share content (33% more site visits than Facebook)
- More open to unfamiliar brands (97% of Pinterest searches are unbranded!)
In other words, you can’t find an audience like Pinterest anywhere BUT on Pinterest!
Users are primed and ready to engage with the content you publish, which makes Pinterest the perfect place for businesses!
Unique content possibilities
Second, Pinterest is home to a unique kind of content that you can’t find anywhere else.
Content on Pinterest is highly visual, but it also encourages engagement in a way that other social media channels don’t.
For example, this pin displays a recipe, encouraging users to click, read, and save it.

The key to understanding Pinterest content is knowing why people use Pinterest. For example, 85% of pinners go to Pinterest when they’re FIRST starting a new project.
When using Pinterest for business, that means you need to appeal to the creative side of people.
They’re on Pinterest to learn and discover, so the content must be uniquely designed to appeal to creativity.
As a business, you NEED to take advantage of the unique aspects of Pinterest content to tap into the audience you can’t get anywhere else.
Benefits over other social media channels
Envision this scenario:
Someone pins your latest blog post to their Pinterest profile. Then 10 additional people repin that content and another 10 repin that same post.
Suddenly, your content has been pinned and viewed by hundreds or thousands of people. And the sharing and repinning can continue indefinitely.
You might think I’m exaggerating, but this isn’t uncommon on Pinterest!
When you post on Pinterest, it’s common to continue getting engagement on that pin for months or even a year — or more!
Just think of the benefits associated with this:
- Increased awareness
- Additional blog traffic
- New leads
- Increased sales
There isn’t another social media channel that offers this same type of engagement!
These 3 points are just a few reasons why we recommend adding Pinterest to your social media marketing mix.
Without it, you’ll be missing out on an entirely different audience and source of traffic to your website!
How to use Pinterest for your business: 10 steps to success
Using Pinterest isn’t tricky.
But there is a tried-and-true process to help you succeed on the platform.
That’s what the rest of this article is going to focus on.
If you follow the 10 steps outlined here, you should quickly learn how to use Pinterest to grow your business.
Important terminology
Before we dive into our 10 steps for using Pinterest for business, let’s cover some critical Pinterest terminology.
You’re already on other social media, so you’re used to words like “like,” “share,” “follow,” and “comment.”
Pinterest uses most of those words, BUT it also uses an entirely different set of words that you need to understand.
Let’s look at 6 terms you need to know to use Pinterest effectively.
1. Boards
Imagine Pinterest as walking down the halls of a middle school.
You see various bulletin boards on either side of the hall.
Each one contains content for a specific club, class, or sport.
Pinterest is exactly like that.
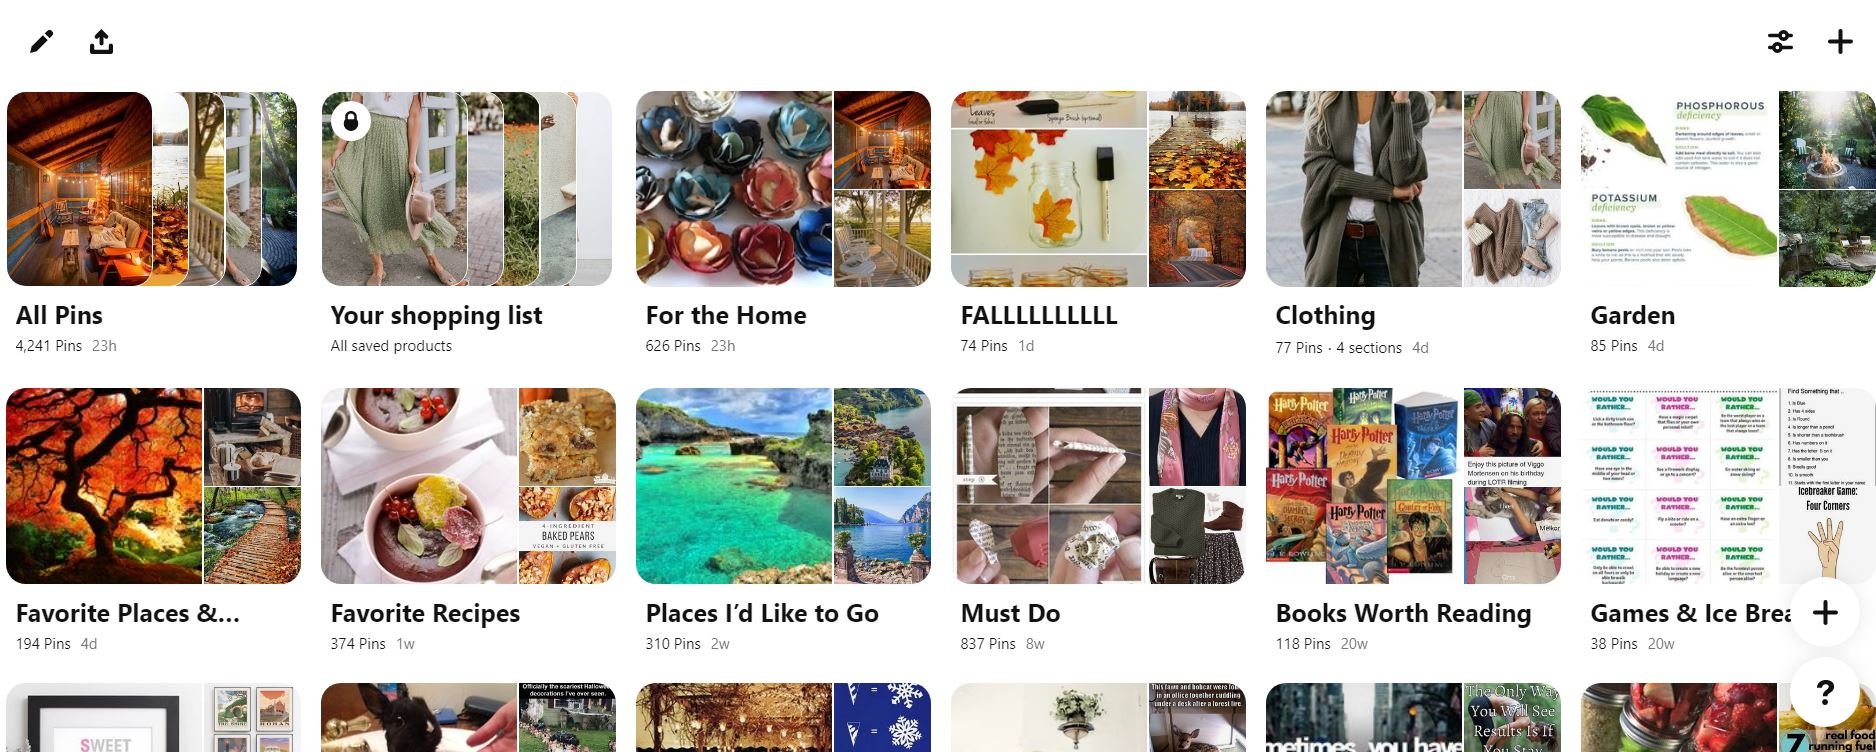
Your boards are just places where you put similar content together.
For example, one board might be “Facebook Marketing” while another captures content surrounding “Pinterest Tips for Newbies.”
 2. Secret boards
Secret boards are the same as above, except they’re private.
No user but you or anyone you invite to pin with you can see your pins until you make the board public.
Typically, people use secret boards to save content that they don’t want to share with others.
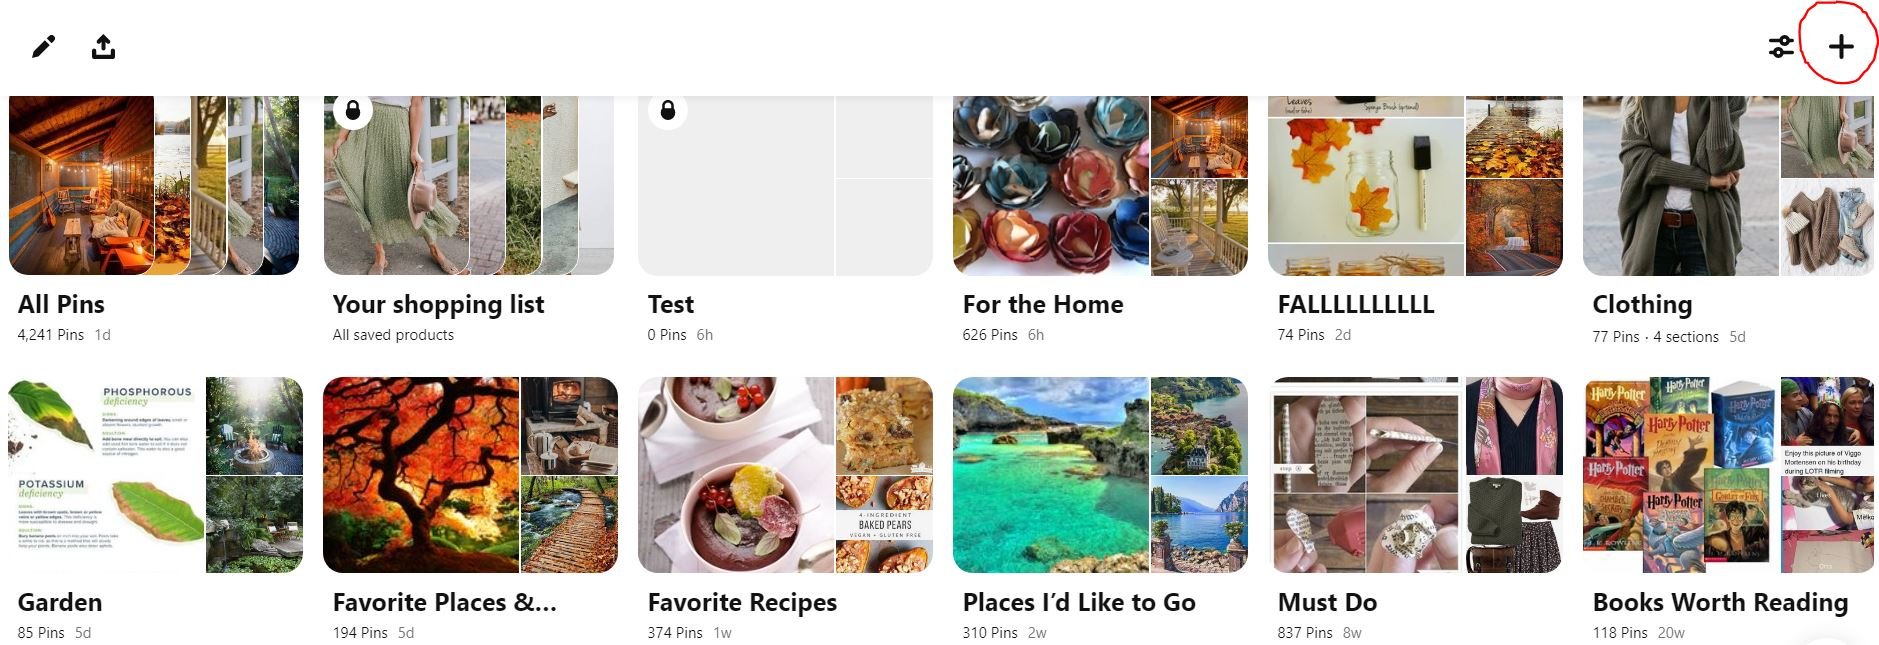
Secret boards appear on your profile with a lock icon. That means they’re only visible to you.
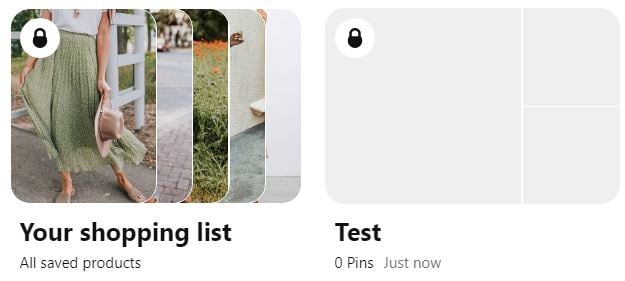
For example, you might want to save some of your competitors’ pins, but you don’t want other people to see them.
You would just add those pins to a secret board.
3. Group boards
Group boards work the same as typical boards but have multiple pinners sharing content within the board.
If you’re collaborating with a team, a group board is a perfect way to share content.
4. Pin
Most social media channels use the word “post.”
The Pinterest equivalent of a post is a “pin.”
A pin is an image you add to a board that links to an external webpage (an article, product page, blog post, etc.).
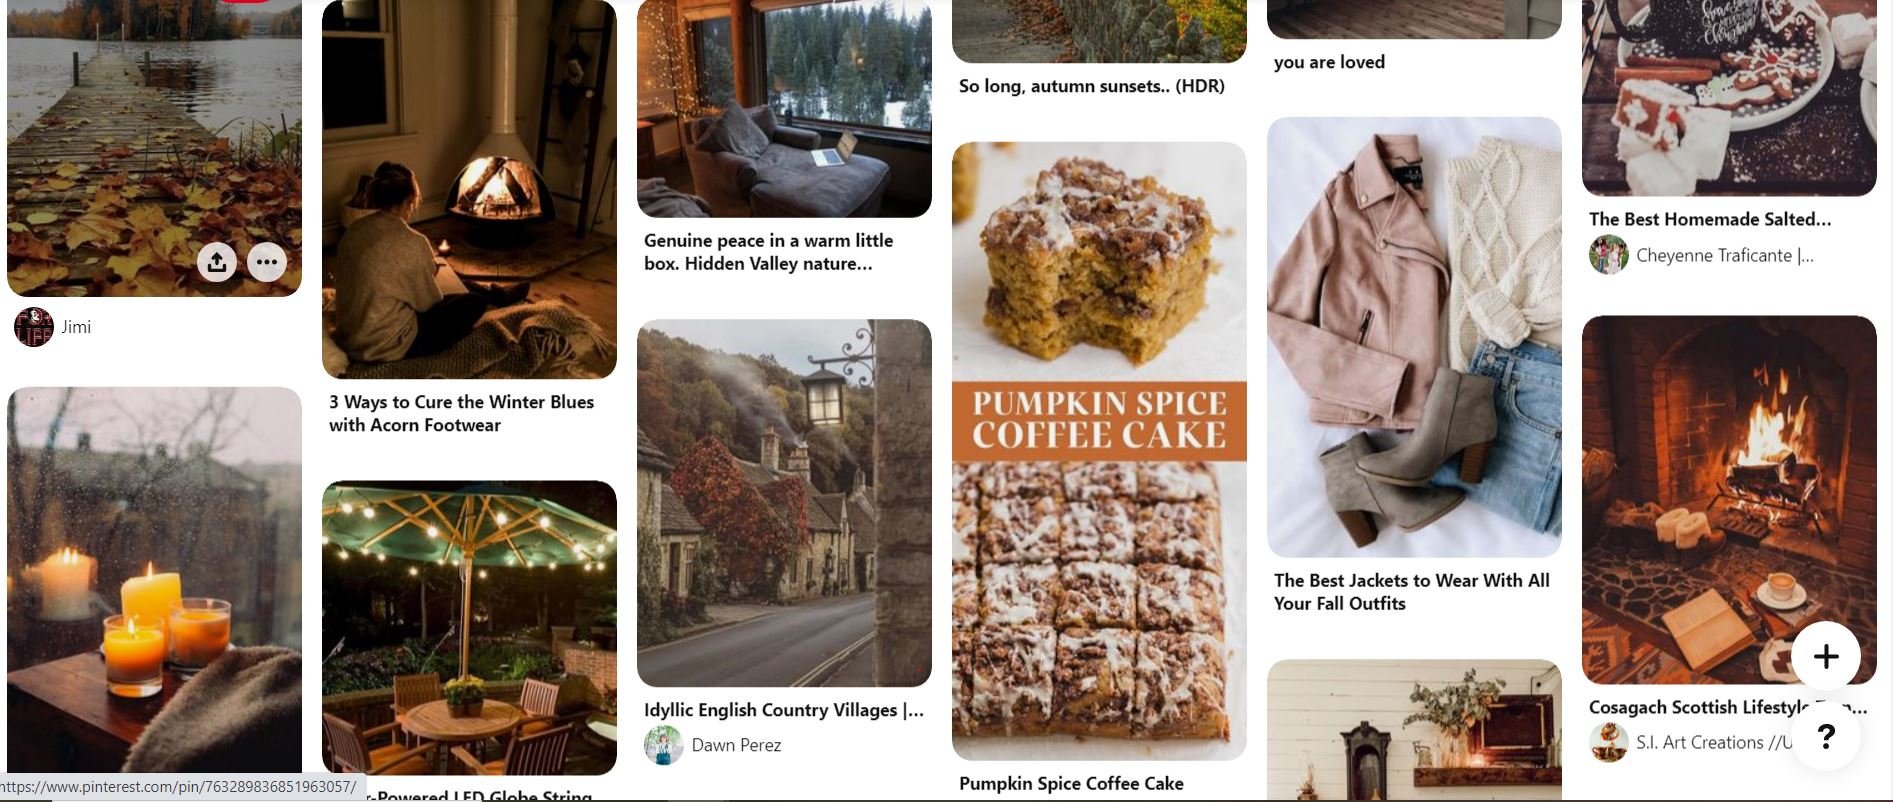
When you’re scrolling through your feed on Pinterest, what you’re seeing is other users’ pins.
 5. Repin
When you repin someone’s content, you’re sharing it with all of your followers. You repin by selecting one of your boards and saving the pin to that board.
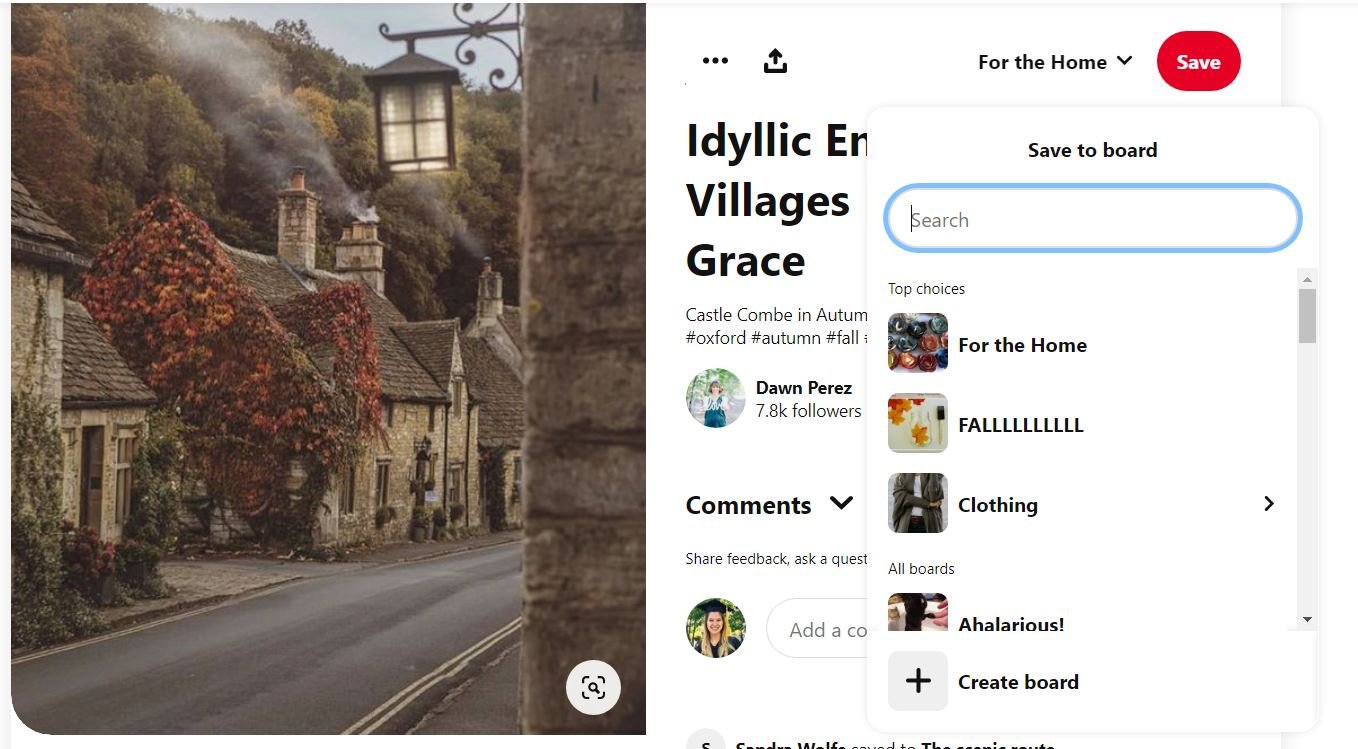 It’s similar to a Facebook share or Twitter retweet.
It’s a way to say, “Hey, I like this, and I’m choosing to share it with my community.”
Side note: Repinning something makes it immediately visible to your followers unless you choose to save it to a secret board.
6. Comments and likes
Comments and Likes on Pinterest are no different than they are on Facebook.
 Find a pin you really like? Leave a comment or click “Like” to show your support.
PART 1: Getting started — Pinterest basics
Let’s start by going over the basics of using Pinterest for business.
Your 1st step is to create a business account.
If you currently use a personal profile for your business, you’re missing out on a bunch of awesome features. The most important of which are:
- Analytics
- Rich Pins
- Promoted Posts
You won’t have any of these features until you get a business account.
That’s why the first part of our guide will focus on getting your account set up correctly.
STEP 1: Set up your business account
Setting up Pinterest for business isn’t difficult. There are 2 ways to get a Pinterest business account.
You can create a new account for your business or convert your profile into a business account.
There are no advantages to either of these options, so the choice is entirely up to you.
If you want to keep your private and business account separate, choose the 1st option.
If you prefer to keep everything consolidated, choose the 2nd.
1. Create a brand new business account (in addition to your profile)
- If you already have a personal Pinterest profile and you’re logged in, log out now.
- Go to Pinterest for Business and choose “Sign Up.”
- Complete the details about your business and manager of the account
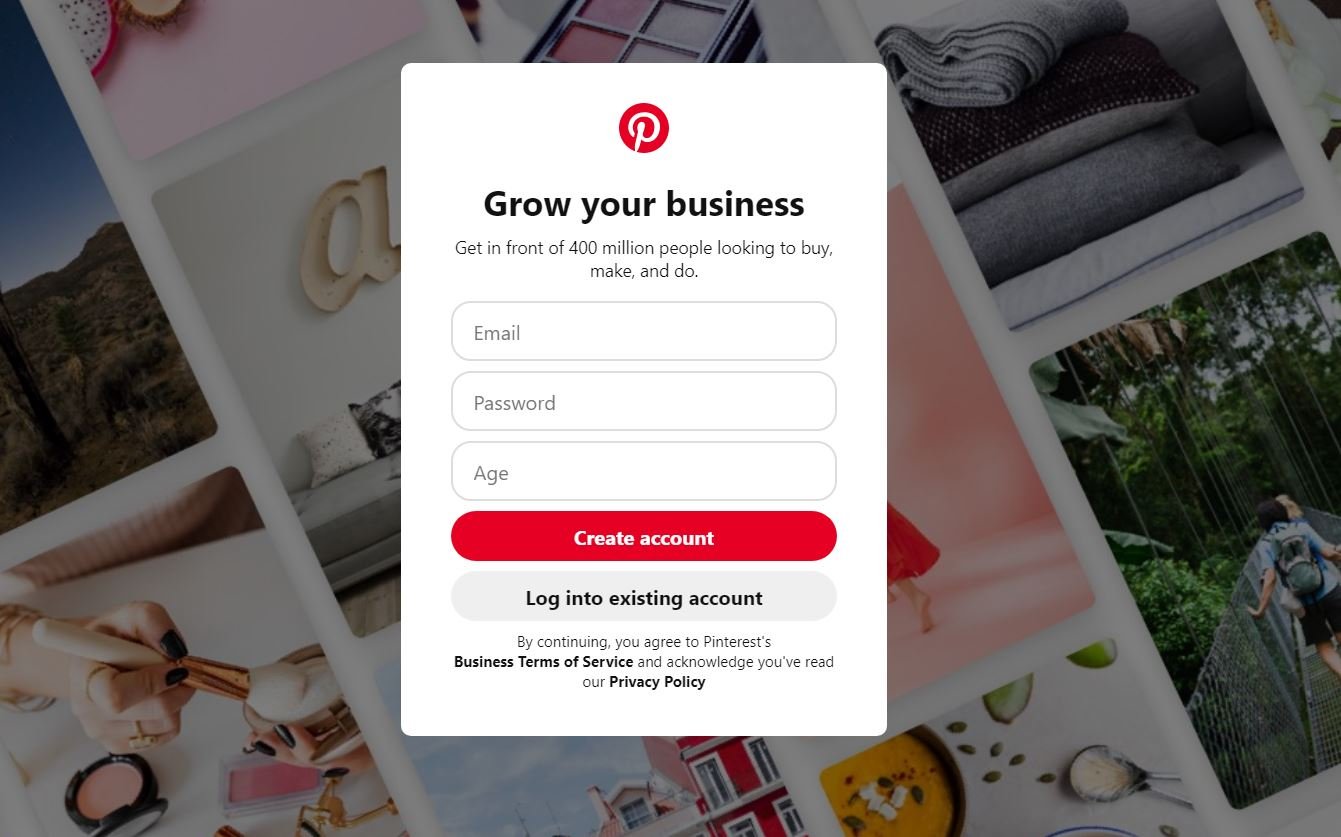 4. Read and accept if you agree to the Pinterest Business Terms of Service and click “Create Account."
2. Convert Your Profile to a Business Account
- Log in to your current Pinterest account.
- Click on your profile picture in the top-right corner.
- Click “Convert to business.”
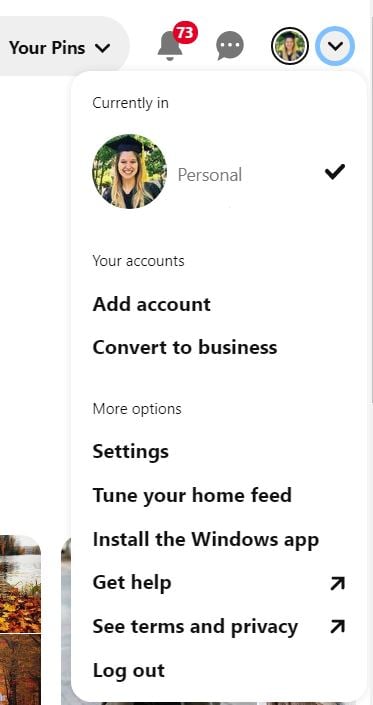 4. Complete the information and click “Convert.”
All your followers, pins, and boards will convert to your new account. Everything will look the same, except for a few additional features.
If you’re new to Pinterest, ensure that your profile is complete and optimized before moving forward.
STEP 2: Complete your profile on your business account
If your profile is only half done, it won’t look very professional to people who click on it.
To make a good impression on potential followers, make sure you complete the following:
- Upload your most current headshot or logo.
- Choose your username (this might autofill when you set up the account).
- Add your bio — including keywords that are optimized for search.
- Add details that'll connect people to you: What do you love, and what will you be pinning?
- Add your location.
- Add your website (see next steps for verifying your website).
Remember, Pinterest is a visual network. Think visual!
Give people the opportunity to see and understand your passions and interests.
For example, telling a story about your business makes it easier to connect with you (which means they’re more likely to follow you).
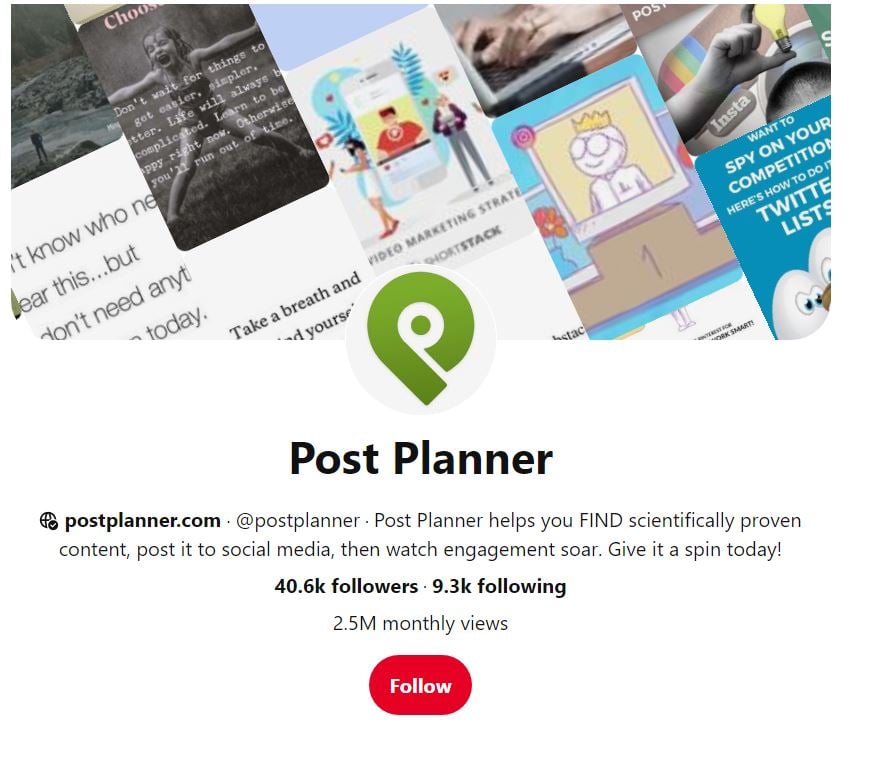
Here's an example of our profile and what your Pinterest business profile should look like:
 STEP 3: Claim your website
If you don’t claim your website, you won’t have access to Pinterest analytics for pins created from your content.
However, analytics are critical for understanding your success, so you don’t want to skip this step.
Here's how to do it:
1. First, go to your account settings, then click “Claim” on the left-side menu.
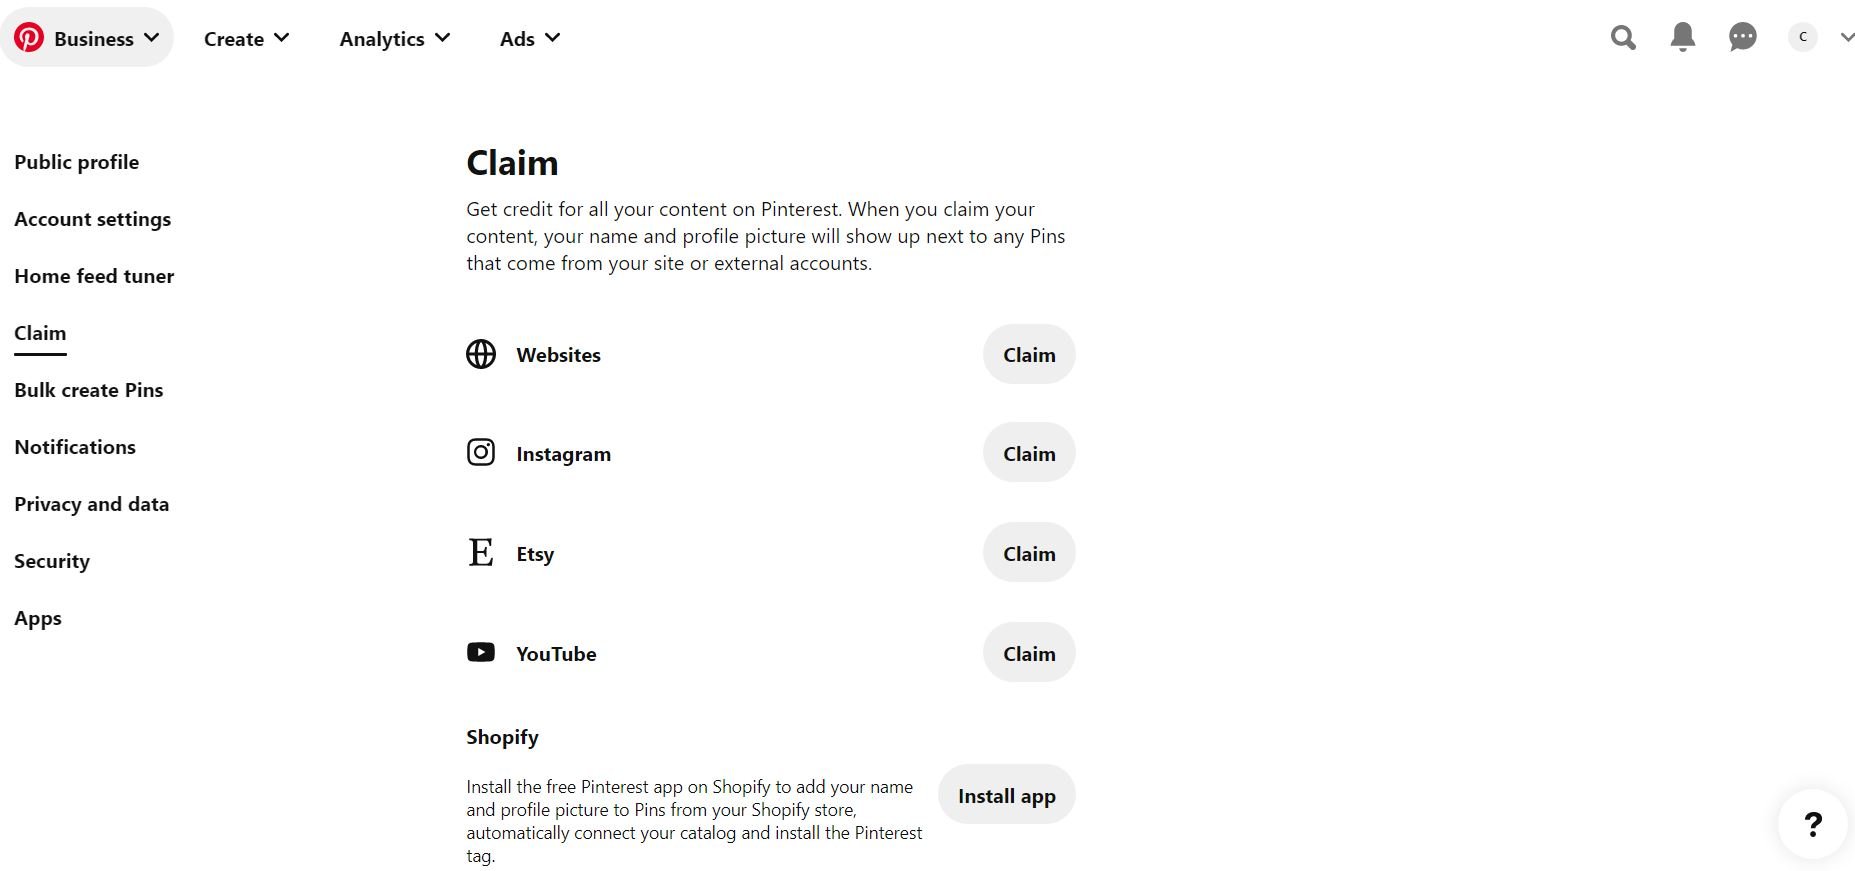 2. Click the “Claim” button on the websites row.
3. You’ll see a pop-up with verification instructions. Download the HTML file.
4. Upload the file into the root directory of your website via FTP or CPanel, then return to your Pinterest profile.
5. Type in your website URL (which should now have the HTML file in the root directory) to finish claiming it.
STEP 4: Set up Pinterest rich pins
Rich Pins are pins that include extra information right on the pin itself. This includes things like:
- Pricing
- Availability
- Product info
- Recipe info
- Article headline, title, author, etc.
What does that mean for your business?
If you sell products, you can easily attach pricing info to your pins.
Rich pins get even more engagement than standard pins, so it’s a good idea to activate them as soon as possible.
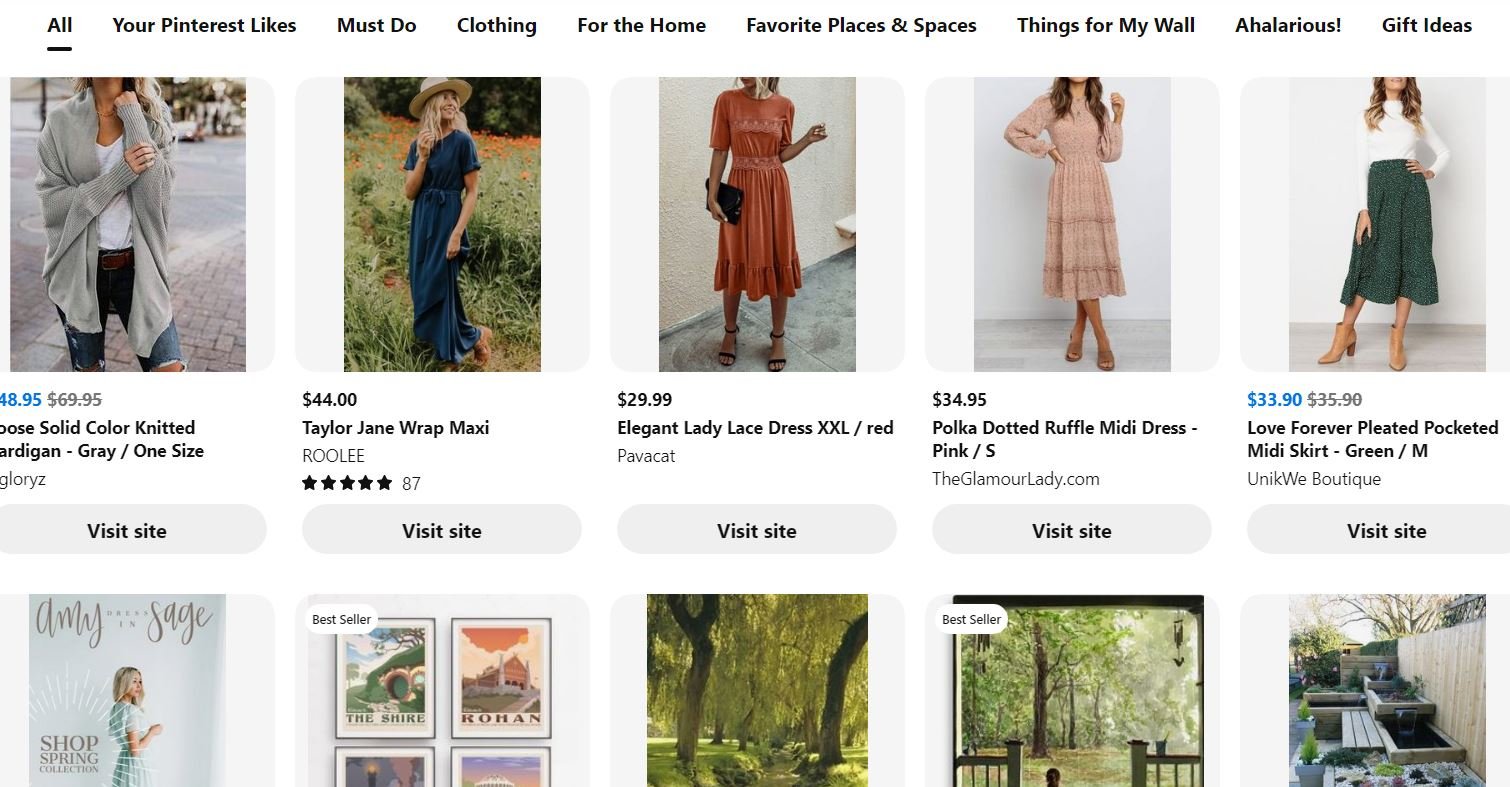 Before getting started with Rich Pins, you need to request access and add specific markup code to your website or blog.
After uploading the necessary code to your website:
- Go to the Rich Pin Validation Page.
- Copy the URL of your content and paste it into the Rich Pin Validator.
- Click “Validate.”
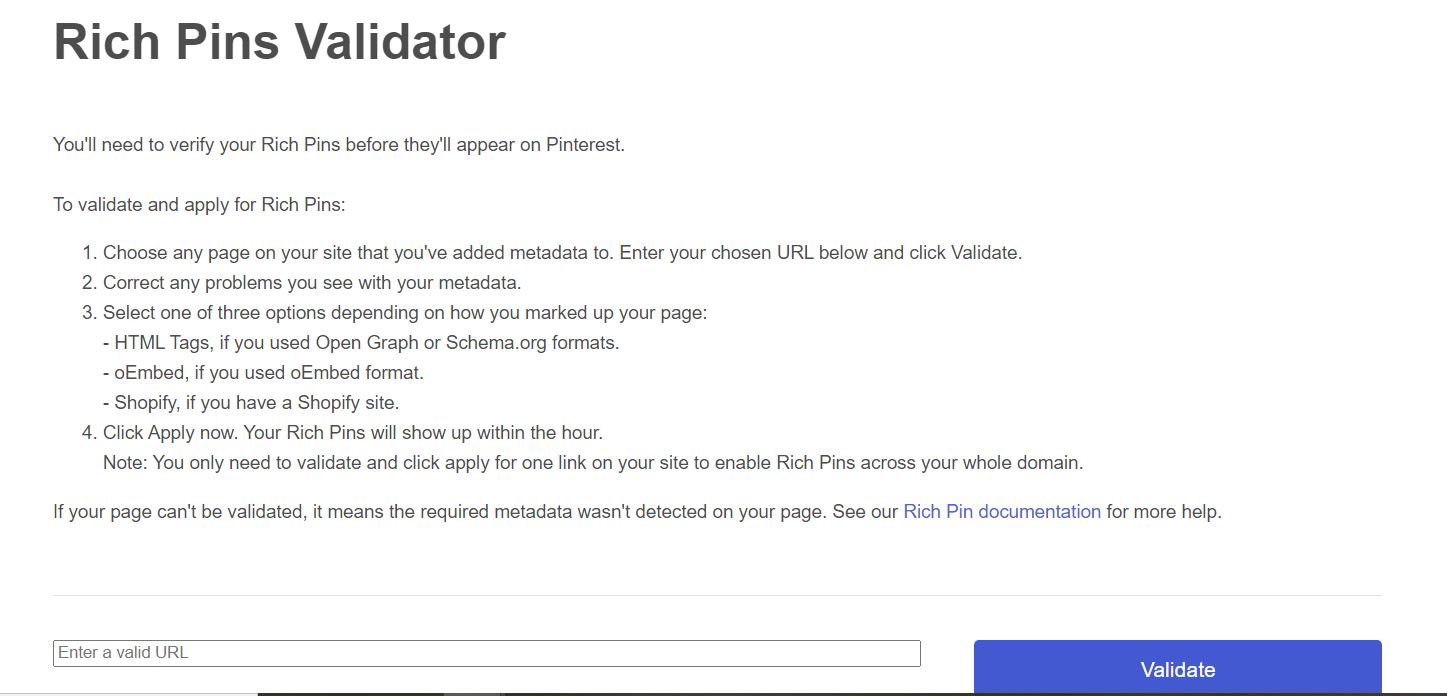 Pinterest will then notify you of approval within about a day.
Rich pins add more data to your pin and help you get more engagement. So don’t delay this step!
PART 2: Boards and pins!
With the technical stuff out of the way, you’re ready to set up boards and start:
- Pinning
- Commenting
- Liking
- Repinning
All of these actions are critical for increasing your visibility on Pinterest!
If you’re familiar with Pinterest, feel free to skip down to Part 3 for more advanced tips.
But if you’re new to Pinterest, keep reading Part 2 to make sure you have the basics down.
STEP 5: Set up Pinterest boards
Now it’s time to set up your initial Pinterest boards.
Naming your boards will be based on your keywords, terms, or phrases.
Pinterest works like a search engine, so optimizing your names will make your boards more discoverable.
Pinterest also recommends using a mixture of highly specific board names and more general names.
For example, you might want boards for both “bread recipes” and “french baguette recipes.”
Think about keywords that you’re currently using within your website. Using similar keywords will help you rank across the board.
To create a board, just go to your profile and click the “+” symbol on the right side of the screen.
STEP 6: Find and pin content
Now that you’ve set up your boards, it’s important to start sharing content consistently.
To set up your boards properly, I suggest initially pinning 5 pins to each board. This will fill the thumbnails displayed on each of your boards.
To find content on Pinterest, just start looking up keywords related to your niche. When you find something that you want to share with your followers:
- Click the pin.
- Select a board you want to add it to (or create a new board).
- Click “Save.”
Congratulations! You just repinned your first pin!
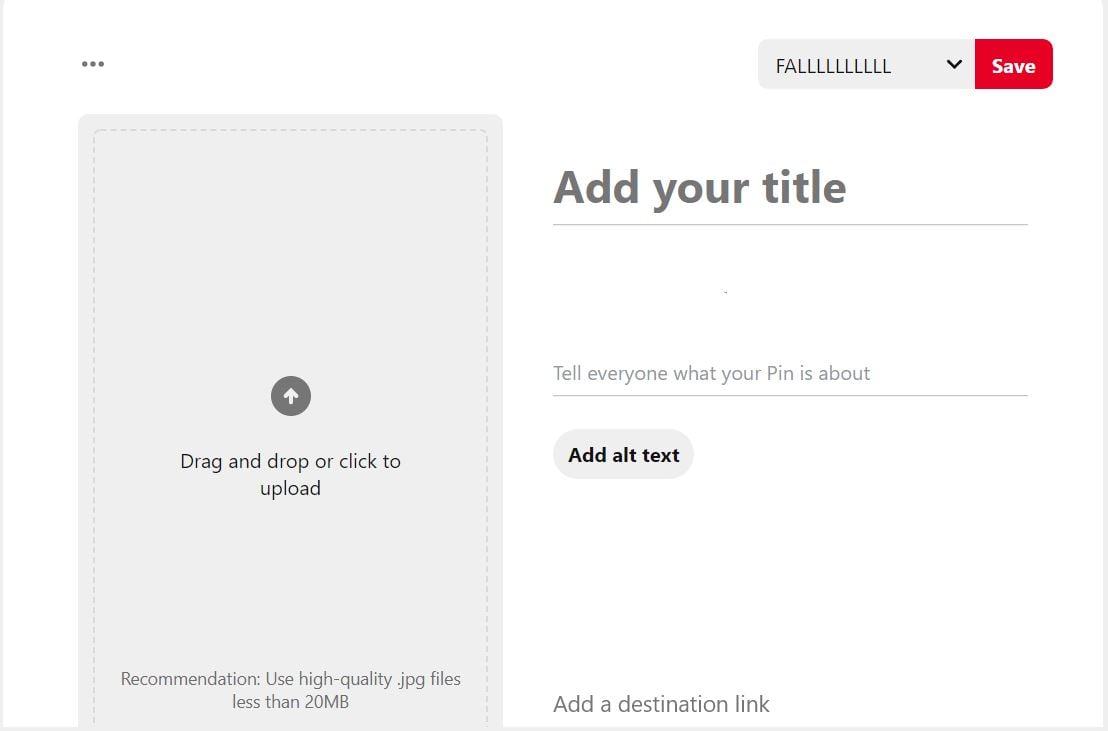
To make your own pins:
- Click the “+” symbol.
- Then, click “Create a Pin.”
- Add a piece of visual content, a link, and a comment.
- Select a board.
- Click “Save.”
 That’s all there is to boards and pins!
Just keep pinning and repinning valuable content for your followers, and you'll start to see your traffic increase over time!
PART 3: Level up your Pinterest strategy
But what if you want to put your Pinterest into overdrive?
Is there a way to generate more clicks, more traffic, and more sales with Pinterest?
If you follow the tips above, you’ll do fine on Pinterest. You won't be the best, but you won’t be the worst either.
There's so much more you can do to tap into the potential that Pinterest offers businesses.
Part 3 is going to focus on taking you from Pinterest novice to Pinterest PRO.
STEP 7: Use proven content
When people start posting on Pinterest, they’re normally just guessing at what might succeed and get a lot of repins.
But there’s a better way to find content than just throwing something at the wall and seeing what sticks.
Post Planner scours the web for content related to almost any keyword you can think of. Then, it organizes that keyword by how likely it is to be successful in your campaign.
For example, I searched for “fitness” in Post Planner.
Instantly, I had access to pre-made content streams FULL of content that I can pin to my Pinterest account.
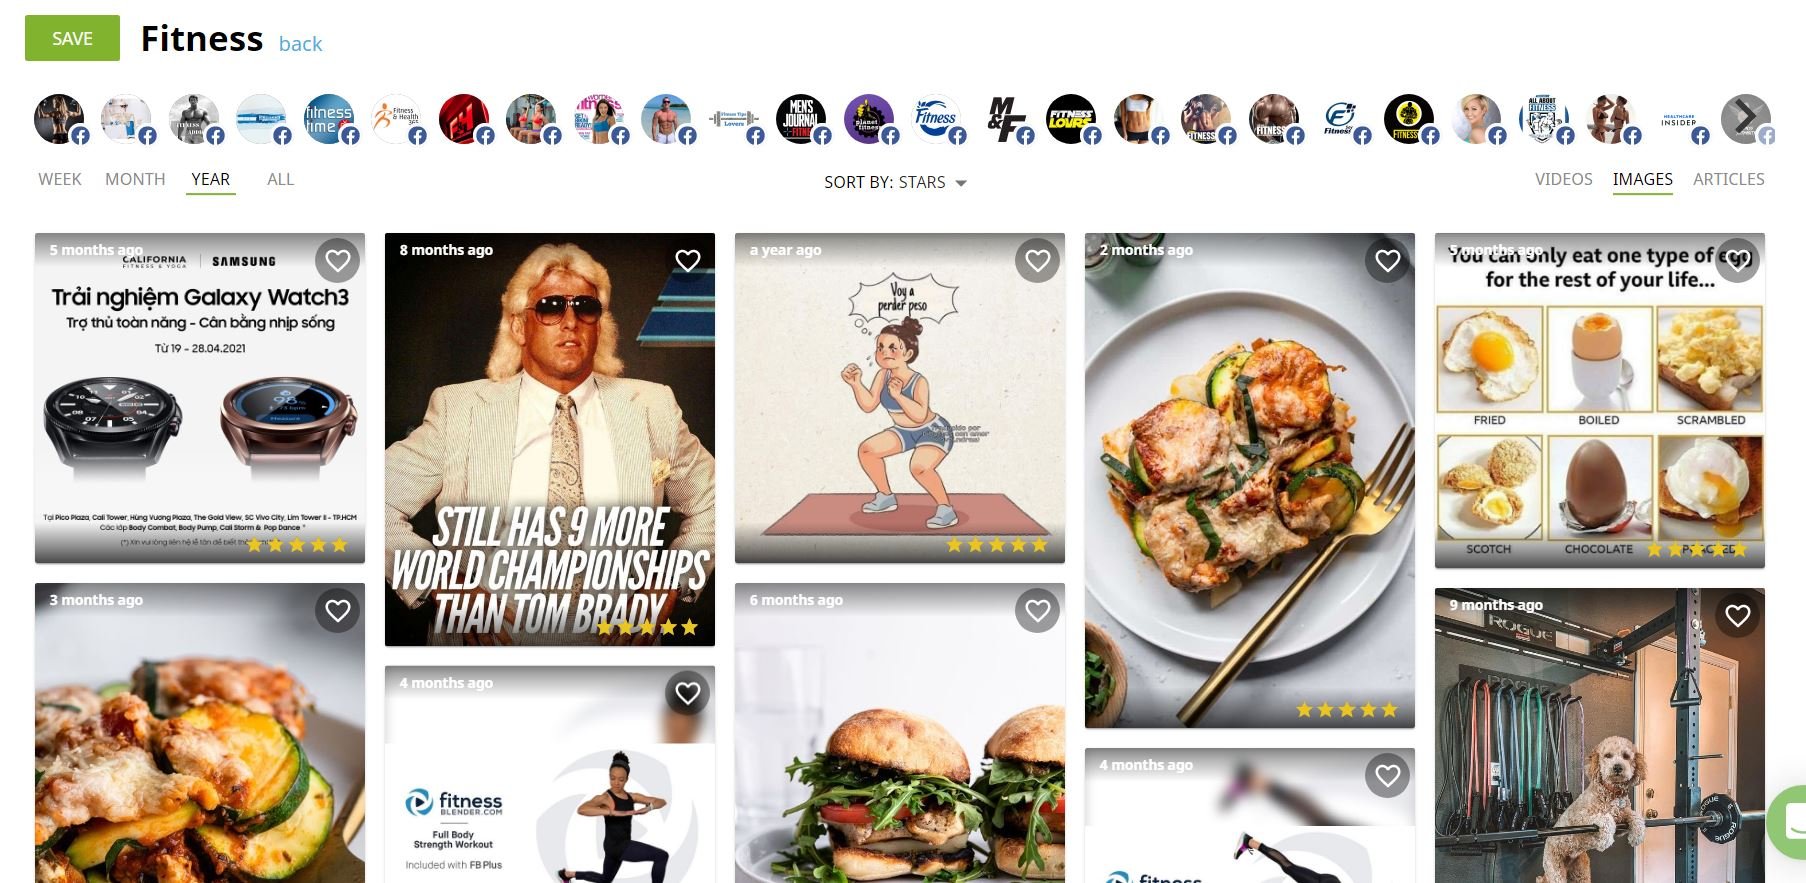 Using content that is already PROVEN to work in audiences similar to yours drastically increases the chances of getting repins and likes.
STEP 8: Automate your content schedule
How many times should you be posting on Pinterest every day?
At a very minimum, 3 times per day.
However, to increase engagement, you should probably post closer to about 11 times per day.
I know what you’re thinking:
“How on earth does anyone have time to post 11 times a day?”
That’s where automation enters the picture.
Post Planner allows you to create a schedule for your social media posting. It will even post them for you!
Here’s how to do it:
1. Select the days and times that you want to post to Pinterest.
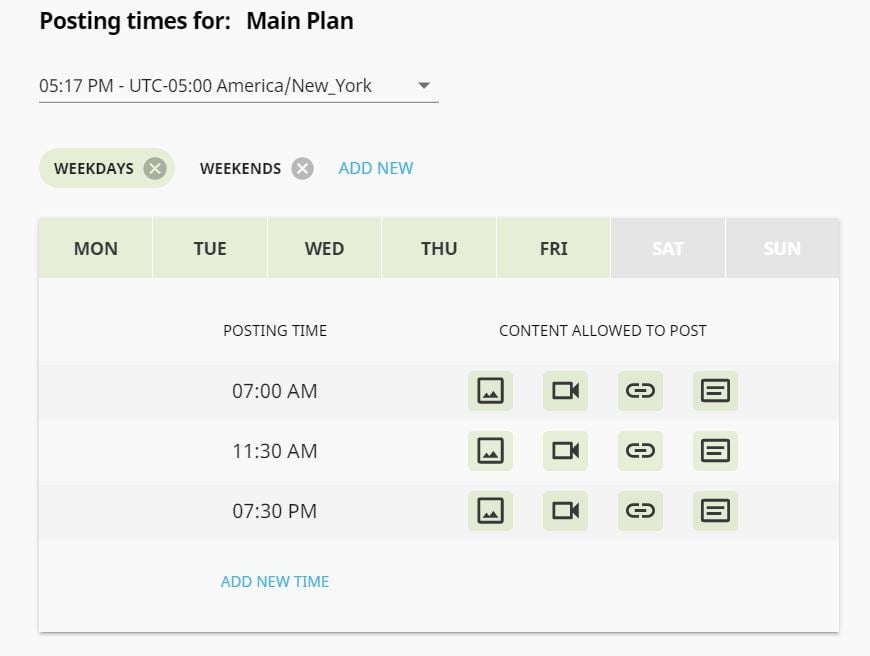 2. Select the type of content that you want to post.
3. Use content streams to find dozens of proven pieces of content quickly.
4. Add anything you think your followers will like to your posting schedule.
5. Watch as Post Planner automatically posts each of your scheduled pins at the appropriate day and time.
Using this strategy, you'll save massive amounts of time on your Pinterest strategy.
Even more importantly, the quality and consistency of your pins will go UP (and so will your engagement).
STEP 9: Recycle evergreen content
Some people feel like they can never post about the same thing twice.
For example, you might write a fantastic blog article about how to be more productive. You’re very proud of it, and you feel like it will help a lot of people.
You make a great image, and you pin it to one of your boards with a link to the excellent blog post.
You’re pumped because it got tons of repins!
Why stop there?
Why not post a link to the article again in 3 months?
And again in 9 months?
And again in 1 year?
There’s no reason NOT to recycle your best content.
Post Planner makes it incredibly easy to do.
When you’re scheduling your post, just toggle the “Recycle” button.
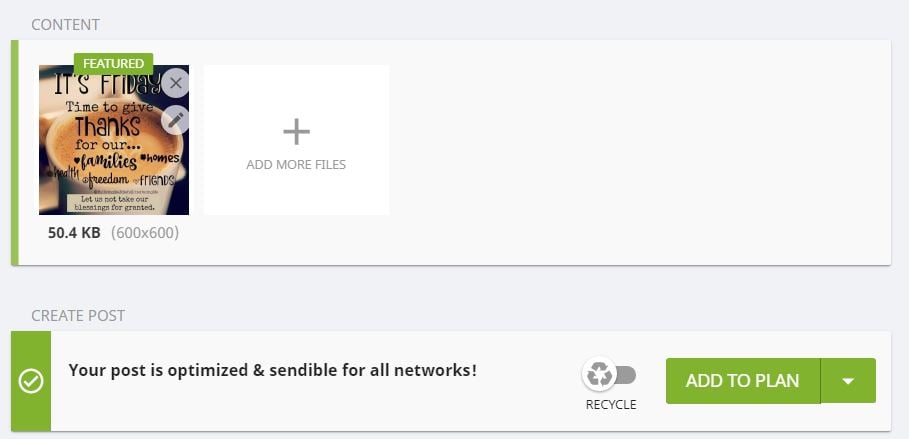
That fantastic blog post will now AUTOMATICALLY be added back into your posting schedule.
Don’t let that excellent blog post go to waste! Recycle it!
STEP 10: Make better images
Pinterest is a highly visual social media channel.
So you need to ensure that your visual content is top-notch.
You can’t just grab some stock photo off of Google, slap it on one of your pins, and call it a day. You have to be intentional about making GREAT images.
Fortunately, Post Planner has a solution for this problem as well.
The app has full integration with Canva.
So when you’re making a post, you can quickly jump over to Canva, use their design tools to create an eye-catching image, then post it to Pinterest.
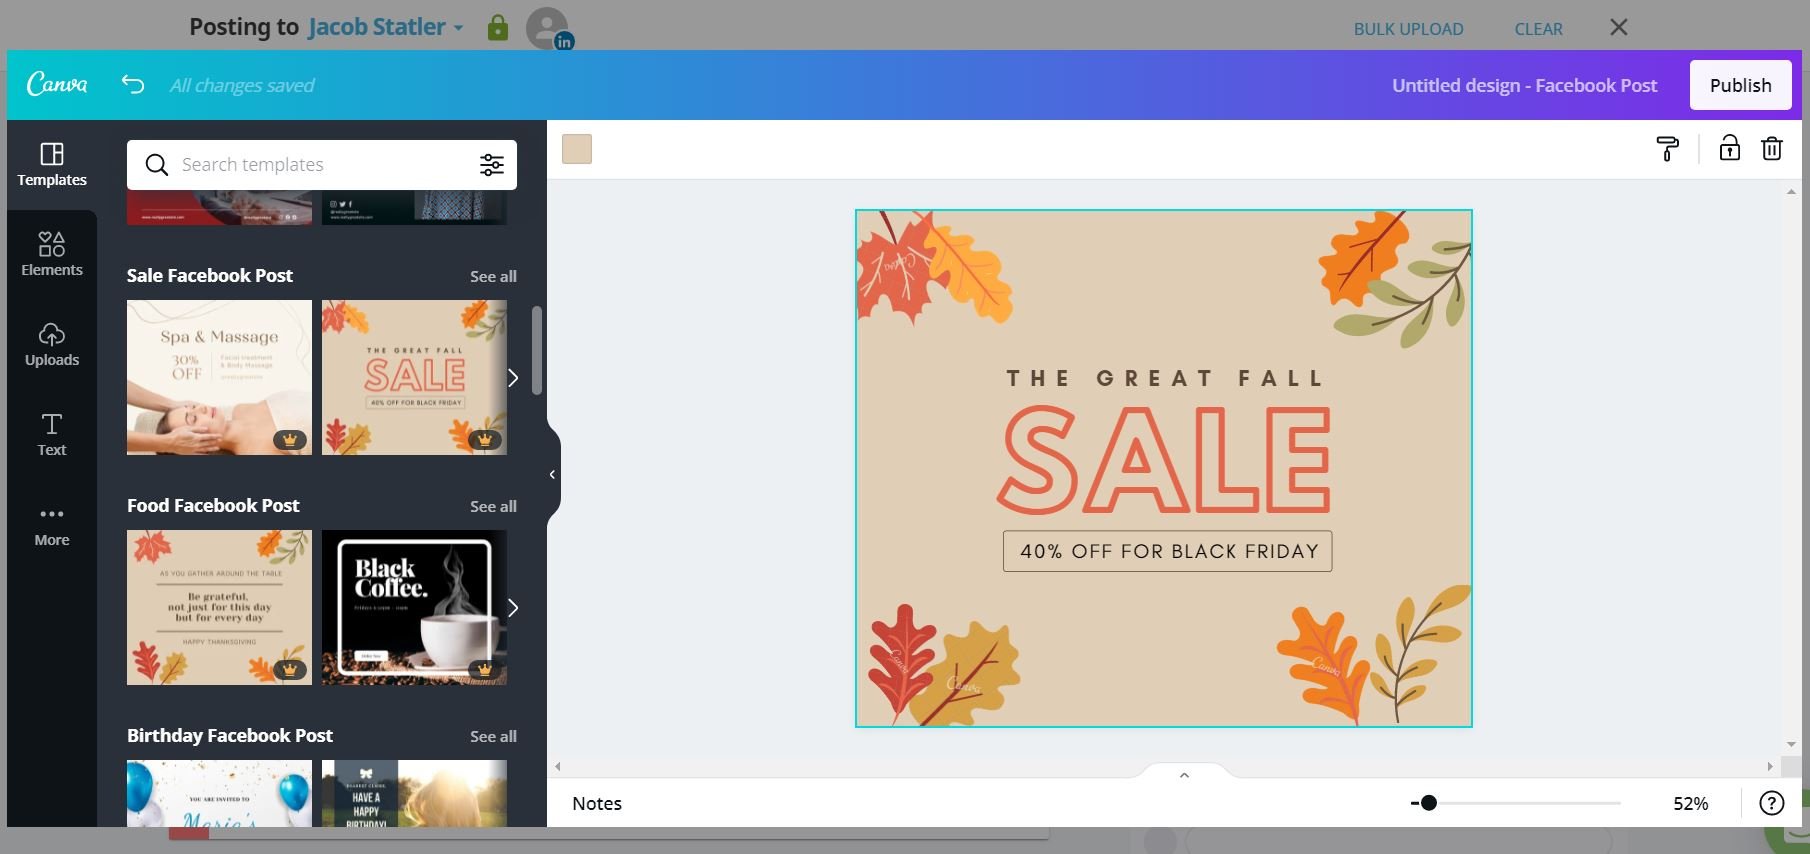 Pinterest images with a 2:3 aspect ratio get the most engagement because they take longer to scroll past.
Canva makes it easy to modify the shape and size of your image to post optimized photos to Pinterest.
Conclusion
I hope this article has helped you learn how to utilize Pinterest for business! Following these tips should help you generate more engagement on Pinterest.
Over time, that engagement will lead to :
- More site visits
- More sales
- More brand recognition
You CAN’T afford to ignore Pinterest’s importance for your business! Take a little bit of time every day to accomplish each of the steps in this article, and you'll see BIG improvement!
How are you using Pinterest for business? What has worked for you? Let us know in the comments below!



ViewHide comments (28)