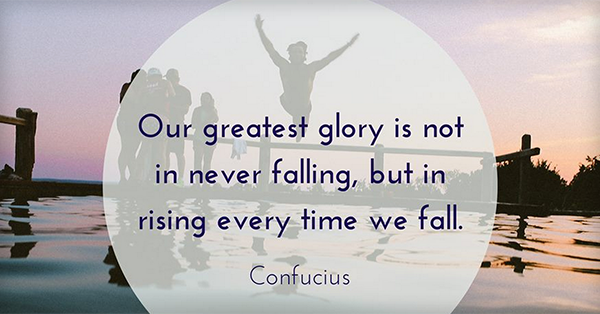
 At Post Planner, we're always trying to make our tool more powerful.
So we're thrilled to announce our new partnership with Canva!
Canva is a design tool that helps anyone create awesome graphics. You probably heard about Guy Kawasaki recently joining their team.
Canva can also be used to create awesome Facebook images -- and it's way easier than Photoshop or other pricey tools!
Basically Canva makes non-artists (like me) look like they graduated with graphic design degrees. And now you can use it right inside Post Planner to create & schedule stunning Facebook images on the fly.
Wow! That's huge. :)
This new partnership could take your Facebook marketing to the next level!
>> Click to Tweet <<
How to Create Viral and Engaging Facebook Posts with Canva
Using Canva's awesome design tool inside the Post Planner app is a cinch. It's as easy as clicking a button. :)
Yep, Post Planner now has a new Canva button!
When you're in Post Planner, just click "Post" then click on the 'box' like you see in "2"
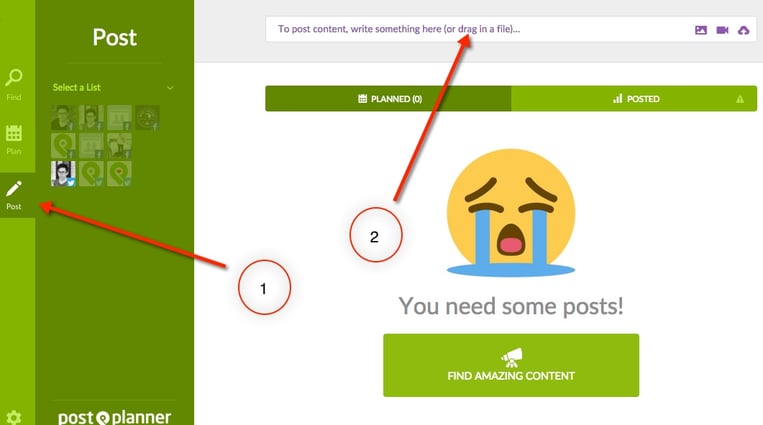
Once you've done that, you'll see a green "Design" button.
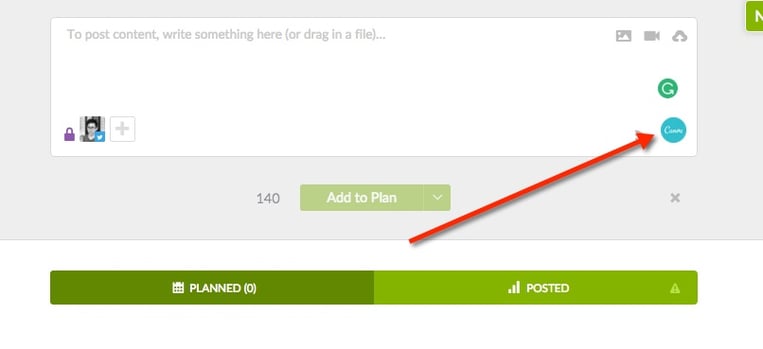
Click that button & design away. It’s that simple!
Method #1: How to Create a VIRAL Photo with the Canva button
Step 1: Browse Viral Photos
Start by browsing through the scientifically-proven viral images in the "Awesome Quotes" folder in Post Planner's Viral Photos finder.
Just click "Viral Photos" and then the "Awesome Quotes" folder. You'll then see the most viral photos posted by the 30+ Facebook pages in this folder.
Step 2. Find a viral photo
I recommend always choosing a 4-star or 5-star photo. These type of content usually get the most engagement and shares.
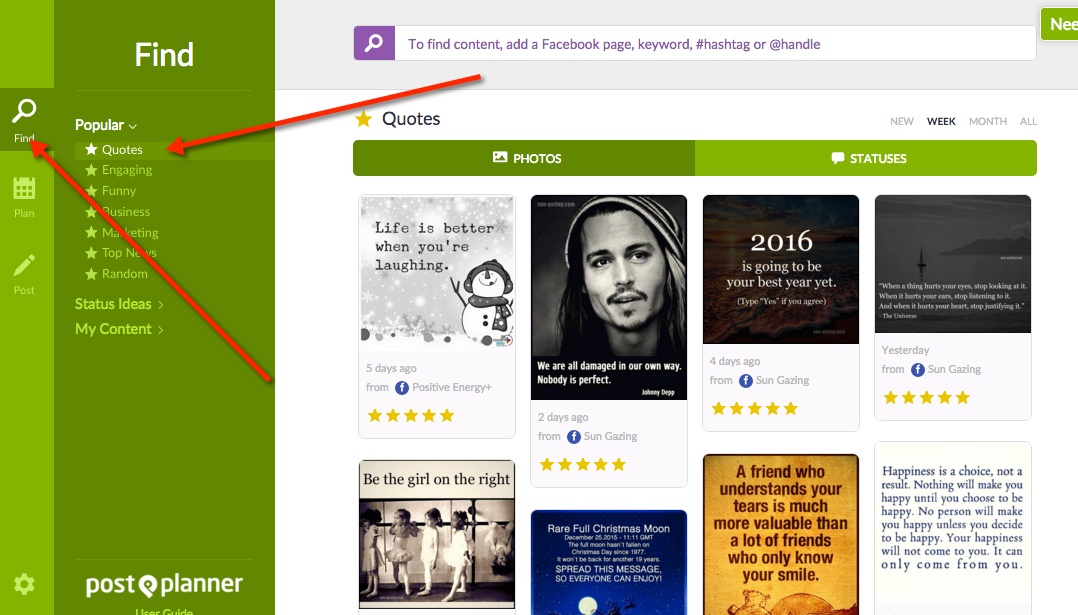
Step 3: Copy the text
Just write the text down in your browser URL box -- or in notepad.
Step 4: Open Canva
Here's where you click "Photo" then the Canva button to launch Canva’s designer.
If you're not already logged in to Canva, you'll need to sign in.
Once you sign in, you will see this:
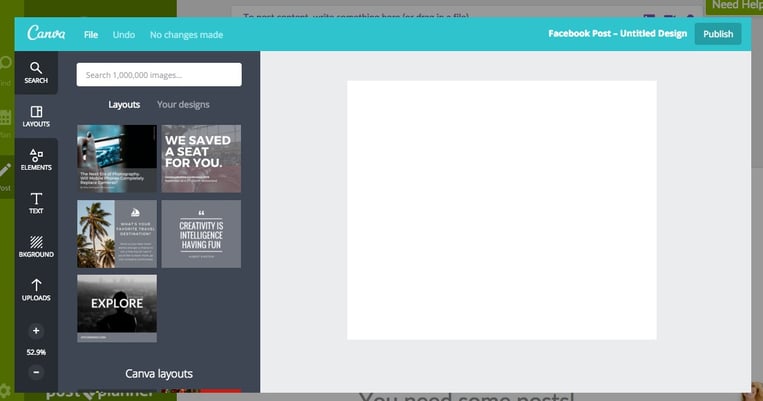
Step 5: Choose a template & add text
Here's where you start designing. Just copy & paste the text from the viral photo onto a Canva layout.
All you have to do is edit the words and you're done!
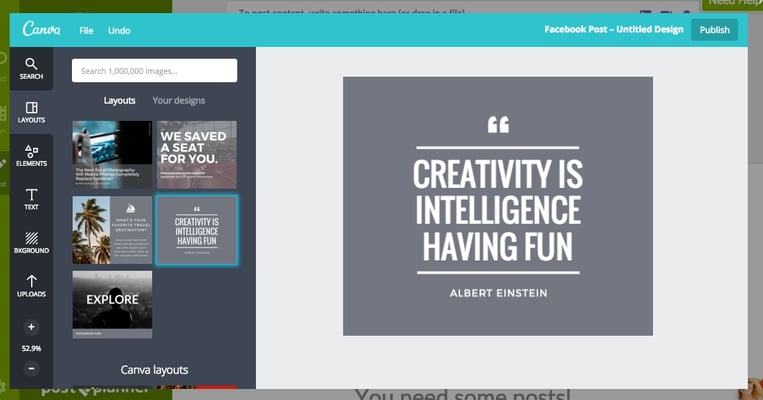
Step 6: Click "Publish"
When you graphic is ready, click publish & it will be added to your Post Planner app in the publisher.
You can then opt to publish immediately or schedule the post for the future.
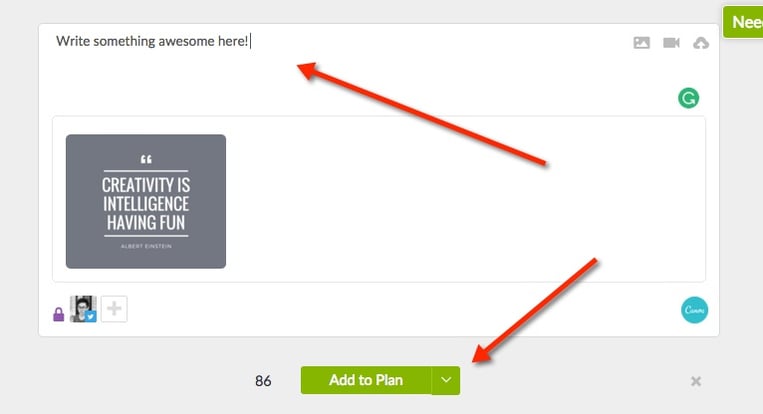
Tip:
When doing the above method, it helps to open 2 Post Planner tabs in your browser -- one for finding viral content & one for designing.
Method #1: How to Create an ENGAGING Photo with the Canva button
Step 1: Browse Status Ideas
Start by browsing through the 15,000+ status ideas in the Post Planner Status Ideas Engine.
You can search for:
- Inspiring quotes
- Fill-in-the-blanks
- Questions
- and lots more!
I'm going to look in "Fill-in-the-blank" to find a cool question.
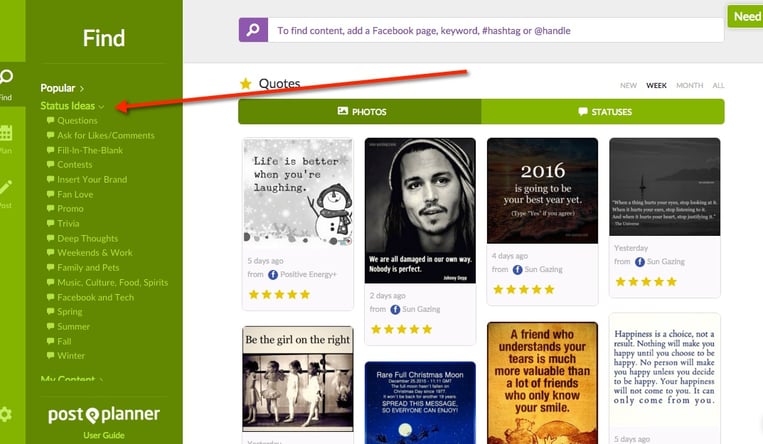
Step 2: Choose a Status Idea
Once you find a status idea you like, just click it and you'll automatically copy the entire thing.
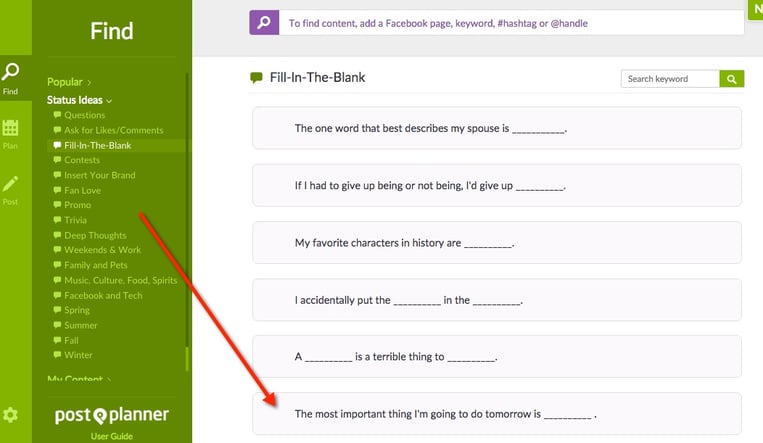
Step 3: Design in Canva
Here the process becomes the same as the one above for creating a viral photo.
Click "POST" & the Canva button to launch the Canva pop-up.
Then choose a template that suits the status update. Then paste the text into Canva.
Here's my design:
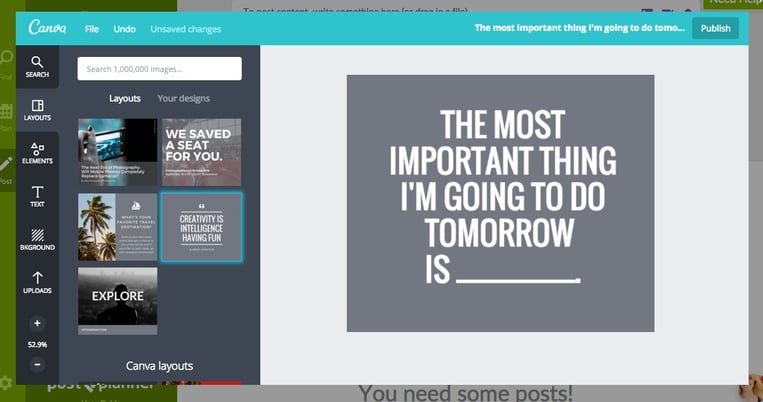
Step 4: Post or schedule the image
Click "Publish" in Canva when you're finished designing your image.
You'll then see your image in Post Planner's publisher -- ready for posting or scheduling. :)
For this example, I decided to just share now. Which will immediately post to your Facebook or Twitter account.
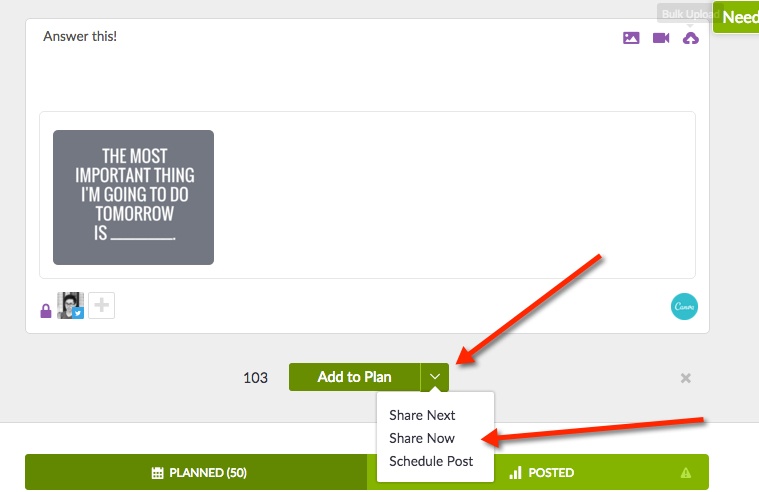
Voila! Here's my final product:
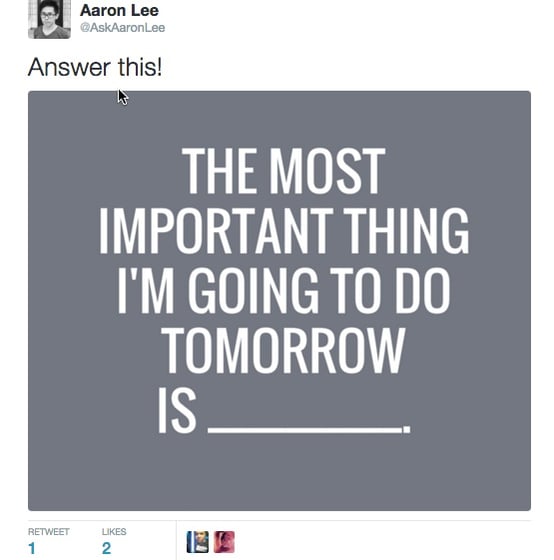
This image took all of 5 minutes to create -- and it's a photo that will stand out in the news feed.
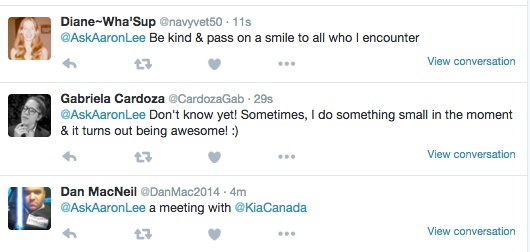
The best part is, it drives engagement quick! Here are 3 responses that I got in a few minutes
Here's another post I designed using the Canva button:
Summary
Post Planner & Canva have teamed up to provide the most user-friendly content creation & scheduling experience on the web.
It's insanely easy! :)
So click here to go to Post Planner. Then follow the instructions above to create & publish some awesome viral & engaging Facebook posts!
And don't forget to share the results in the comments below. ;)


ViewHide comments (2)