 Want to piss off a lot of people & kill your page's Edgerank?
Then use the "Promoted Posts" feature on your page Timeline ASAP!
Facebook has recently changed the default settings on Promoted Posts to force page owners to promote their posts to Fans AND Friends of Fans.
In the past you could choose Fans ONLY -- and not their Friends too.
Not anymore.
Why is this a BIG deal?
It's a big deal because the potential downside of promoting posts to non-fans is much larger than the potential upside.
In fact, by promoting your posts to non-fans, you risk a huge backlash & significant long-term damage to your page.
In almost every case where I've seen pages promoting posts to non-fans, the sentiment on the posts (judging from the comments) is super negative.
Ie. hundreds of comments screaming "spam" (and other 4-letter words) -- and hundreds of people clicking "Report Story or Spam" on the post.
Edgerank Nosedive
If hundreds of people mark your post as spam -- whether the post is promoted or not -- then your page's Edgerank will surely take an immediate nose dive.
Facebook has made it clear that "negative" feedback on posts greatly reduces Edgerank -- and when fans hide your post or mark it as spam -- well, that's about as negative as feedback can get.
But is this fair? The post you promoted wasn't even spammy, was it?
 Doesn't matter.
If other people see your post as spam & mark it as spam -- then it's spam.
In truth, these people probably have a legitimate gripe. Your post is essentially an unsolicited marketing message -- no matter how valuable & informative it is.
It's unsolicited because non-fans have NOT Liked your page & have NOT asked to see your content.
"Unsolicited marketing message" is the very definition of spam, my friends.
So what should you do?
Well, first off don't panic. There's a way to still promote your posts without pissing off non-fans.
Just follow these instructions:
Step-By-Step Guide to Promoting a Post to Fans Only
Step 1: Go to the Ad Manager
There's a bunch of ways to get here. Facebook has links everywhere these days.
For a shortcut just use this link: Ad Manager
Step 2: Choose your page as the "Facebook Destination"
Find & choose the page you want to Promote a Post on.
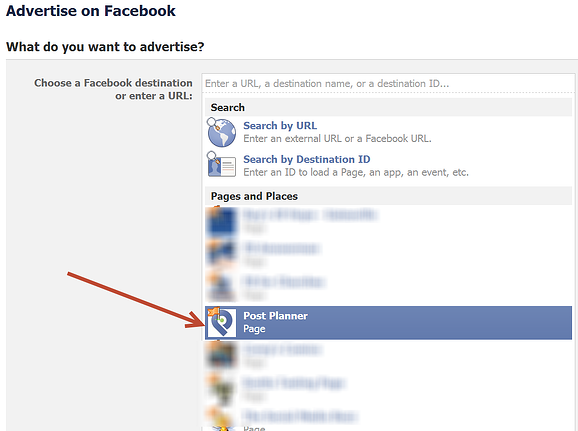
Step 3: Select "Promote Page Posts"
The "Get More Page Likes" option will be selected by default -- so you'll need to change this to "Promote Page Posts".

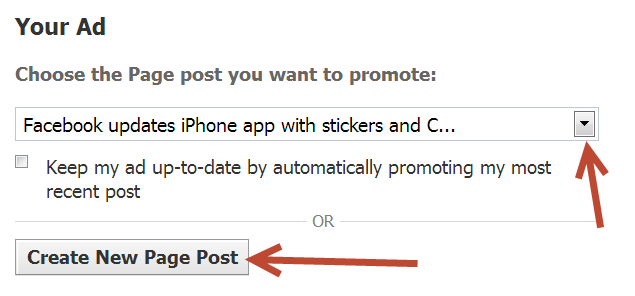
Step 4: Choose the Page Post you Want to Promote
You have 2 options here:
- Select an existing post on your page... or
- Create a new page post.
(For this tutorial, we'll select an existing post)
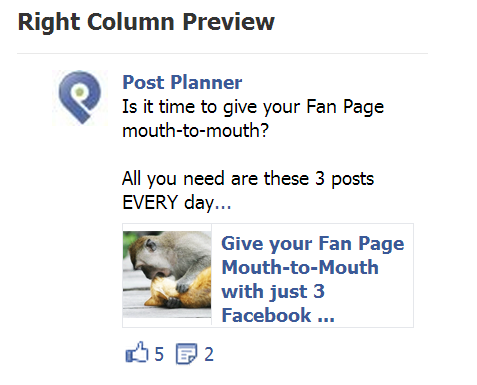
Once you select it, you'll see a preview in the Right Column Preview:
Step 5: Sponsored Stories Settings
You can choose to deactivate certain options here, like:
- People liking your Page post
- People commenting on your Page post
- People sharing your Page post
My suggestion is to leave them all checked & activated.

As I mentioned in a previous post about Like Ads, showing social proof on your ads makes them much more effective.
Step 6: Choose Your Audience
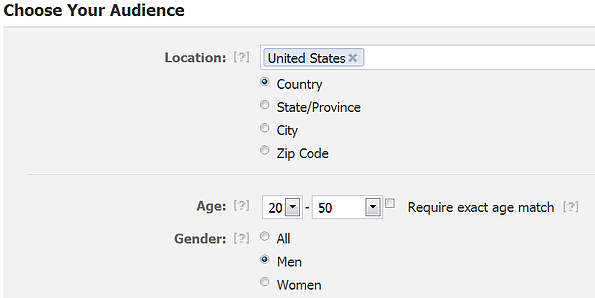
Here's where you choose the Location, Age & Gender you want to target.
In my opinion, you should definitely segment your ads by different location, age & gender targets, as it lets you measure & compare the response of the different segments
Also, if it's 2am in a certain location, then it doesn't really make sense to pay to promote a post there. And unless your page is geared towards teens, you should bump up minimum age to at least 20.
For our ad, we'll choose "United States", ages 20-50 & men.
Step 7: Choose Interests
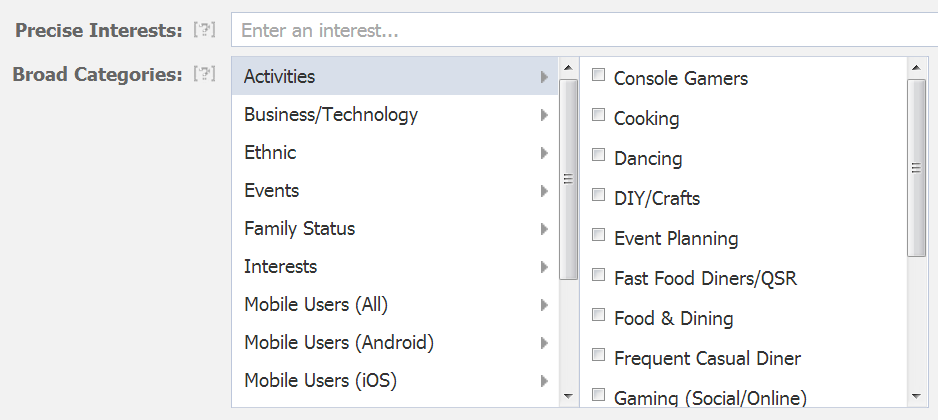
Next you can choose to target fans based on Interests.
This is especially handy if you have a large page & want to drill down & show your post only to people who are interested.
If your post is about baseball, for example, you can choose "Baseball" as an interest -- and the likelihood of engagement will increase.
For our ad we won't choose any interests.
Step 8: Narrow down the Connections
This is THE most important part of the setup process -- and the reason I'm writing this tutorial.
Remember -- if you run a Promoted Post from your Timeline, Facebook requires that you show the post to your Fans AND the Friends of your Fans.
Again, this will only cause you headaches & kill your page's Edgerank.
Here's the way to avoid that!
- Select "Only people connected to XYZ Page" (Post Planner in this example)
- Leave the "Friends of Connections" blank

Step 9: Name the Campaign & Choose Your Budget
You get to name your campaign anything you want. I suggest naming it something descriptive & recognizable -- so you can easily distinguish it from your other ads.
Then you'll need to decide how much you want to spend on the promotion.
If you had promoted the post from your Timeline, you'd be shown something like this:
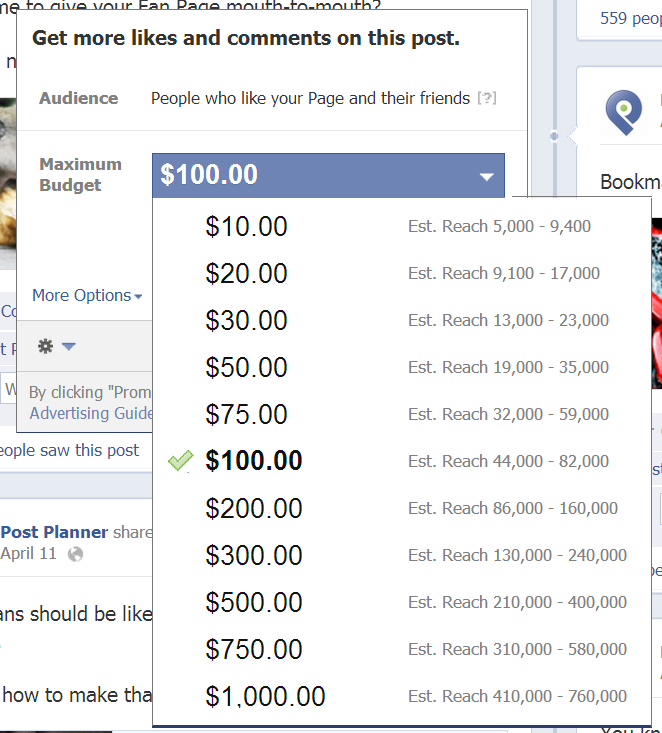
As you can see, both the Reach numbers AND dollar amounts are pretty high -- plus you have no control over the age, gender or location targeting.
By using the Ad Manager instead, you can drill down by location, age & gender and also choose a specific budget.
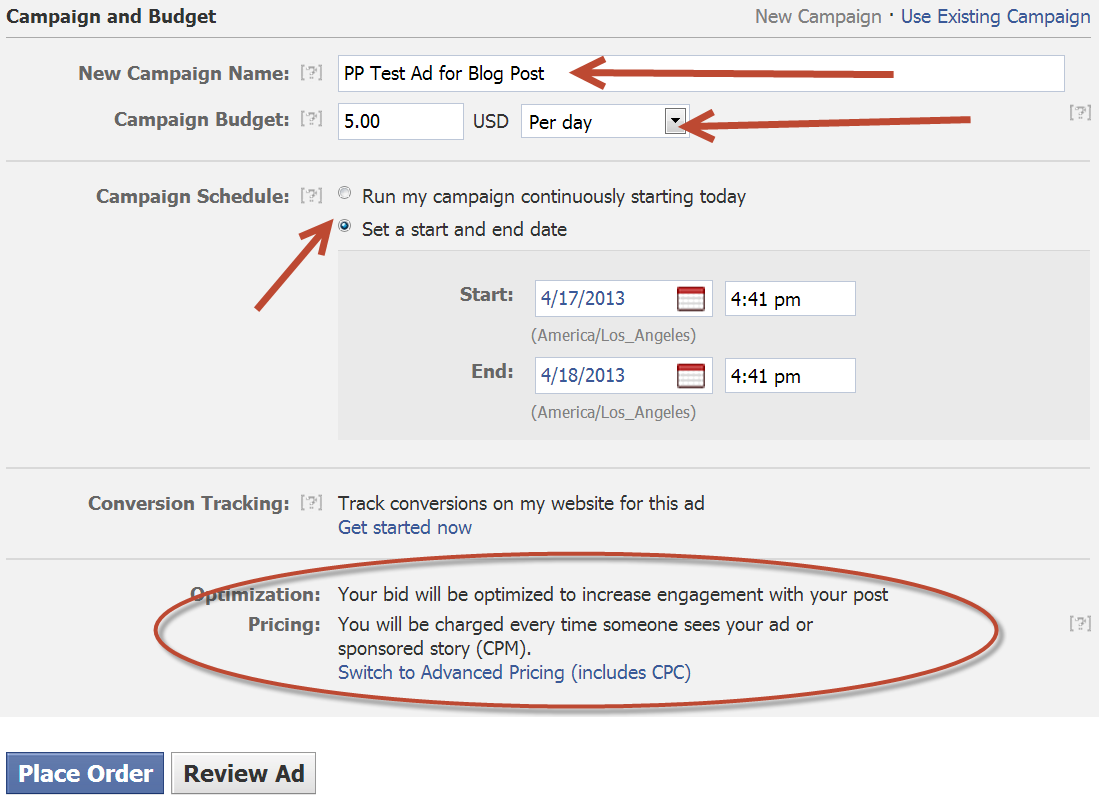
Select your daily or lifetime budget for the promoted post.
Pay attention to the fact that Facebook selects "Run my campaign continuously starting today" by default -- which means the post will be promoted until you turn it off.
For this ad, I'll set it to run for just one day.
Your promoted post will be set by default to CPM (Cost Per Impression) -- and I'd recommend leaving it that way. Trying to bid on a CPC (Cost Per Click) basis could be tough for a promoted post.
Step 10: Place Order
Here you should click "Review Ad" and check for any errors. Once you've done that -- and corrected any errors -- just click "Place Order" & you're done.
Step 11: Wait for Facebook to Approve the Ad
Now you just have to wait for Facebook to approve your promoted post & start running it.
Waiting for Facebook's approval definitely sucks -- and it's the obvious downside of promoting posts via the Ad Manager.
If you promote a post from your Timeline, for example, the promotion will start running immediately -- although it will still be stopped if your post violates any of Facebook rules.
But again, because Facebook won't let you target ONLY FANS when promoting posts from your Timeline, you should not do it there.
Key Takeaways
The Bad News -- You can't promote posts to ONLY FANS from your Timeline anymore.
The Good News -- There's an alternative, and it only require a few more steps.
By using the Ad Manager to promote your posts, you keep control of how the post looks, how it's targeted and most importantly, whether it's promoted to ONLY FANS.
So just use the Ad Manager.


ViewHide comments (4)